Hey everyone! I now will be blogging every week at Vegan Chef Jay! Check it out!


A Tasty Vegan Food Blog with lots of Food, Recipes, Reviews and a Whole Lot More!
Hey everyone! It’s been so long since I last blogged. I really started to miss blogging. This year has been so busy for me and I really wanted to share everything with the world. I decided to create a brand new blog that describes who I am now. The blog is called Vegan Chef Jay and it’s going to be filled with amazing recipes. I am going to be sharing many recipes from our pizzeria/restaurant 3 Brothers Pizzeria Cafe, in Rockville Centre. At the restaurant I am in charge of creating the whole vegan menu! I am really exicted about this blog. I am so happy to have a place to teach people how to cook my recipes at home! If you have been following my blog, you will really like my new blog!
Hey everyone! It’s the fifth day of Vegan MoFo! I hope you all been good. It’s really weird that I haven’t blogged in five months. I have decided to start blogging again after a long break. I am really sorry everyone that I took such a long break. I have received some very nice comments and people have been encouraging me to start blogging again. Thanks everyone! The past couple of months have been quite busy for me. My dad owns a pizzeria on Long Island. In July I decided to offer vegan pizza on our menu! I created the whole menu for the vegan menu. It’s really awesome. We are the only pizzeria on Long Island, NY that has vegan pizza! I’ve been busy at the pizzeria. The vegan pizza has been going very well. We use the awesome new vegan cheese Daiya and Teese on our pizzas. It’s really cool. We are also going to start offering vegan dinners which is going to be amazing. Durning my break from blogging, I also went to Candle Cafe which was awesome. It was my dream to go there for so long and I’m glad I went! So basically these are the major highlights that I have been wanting to share with everyone that reads my blog! I can’t wait to start sharing recipes again! I have been working on an awesome seitan recipe that I can’t wait to share with everyone. Happy Vegan Month of Food everyone! I will try my best to blog every so often durning The Vegan Month of Food! I will leave you with some pictures of our pizzeria!


Pizza Margherita with Teese Cheese

Eggplant Parm Pizza with Cashew Ricotta and Daiya Cheese

Grilled Pesto Pizza with Daiya Cheese

Veggie Lover’s Dream Pizza

These pictures are courtesy of Vegan Meetup Long Island
Hey everyone! I have been planning to write this post ever since last week but I just couldn’t find enough time! Last week I cooked a whole bunch of beans. I cooked some white beans, chickpeas, and pinto beans. I am trying to include more beans in my diet. I really like beans and they are full of goodness. My family usually eats beans Albanian Style like this. This is usually the only way my family prepares beans but I am always looking for new ways to use them. I decided to come up with a new bean dish that was different for a change.
I came up with a White Bean Stew! That day my dad bought some delicious kalamata olives that were begging to be eaten! I also had some capers on hand. I really like olives and capers together, I think it’s a great flavor combination. I thought it would be amazing in this white bean stew. I was sure right the olives and capers brought this stew up one step further! I also added some sun dried tomatoes for even more flavor! This stew was bursting with flavor! I really enjoyed this stew and all of the flavors it had. I simply served it was toasted bread and a salad. You can also add some rice and a vegtable side too. It also made a delicious pasta sauce the next day! This recipe is really flexible and makes a quick tasty weeknight dinner!
White Bean Stew

Ingredients:
4 cups of White beans, cooked or 2 15.5 cans of white beans
2 tablespoons Extra Virgin Olive Oil
1 large onion chopped small
2 small carrots chopped small
1 stalk of celery, chopped small
4 garlic cloves minced
8 Roma tomatoes, chopped (about 3 and a half cups) or one 28 oz can of whole tomatoes
1/2 teaspoon dried thyme
1/2 teaspoon dried oregano
1/4 teaspoon dried rosemary
1 cup of vegetable broth or more if needed
1/4 cup of olives or more, pitted and chopped
2 tablespoons Capers with some brine
1/2 cup chopped sun dried tomatoes
A few leaves of Kale or any other leafy green (Optional)
Salt and Pepper to taste
Heat a medium pot over medium heat. Add the olive oil. Then add the onions and saute for 4 minutes. Then add the carrots and celery and saute for 8 minutes until the onions are translucent. Add the garlic and saute until fragrant about 1 minute. Add the tomatoes, herbs, salt and pepper and cook for 4-5 minutes until the tomatoes break down. Now add the sun dried tomatoes, beans, and broth and bring to a boil. When boiling bring down to a simmer. Simmer the beans for about 10 minutes. Make sure that the stew doesn’t get too dry, if it gets dry add more vegetable broth. Add the kale and cook for 2 minutes. Next add the olives and capers and stir in. Cook it for another 2 minutes. Re-season if necessary.
That’s it for now..I’ll leave you with my cat Kisses. This is her first blog appearance! She loves to “help” me with my homework. She lays on my books like she is on vacation! She’s the best!


Hey everyone! I’ve been meaning to put up this recipe for Lentil Stuffed Peppers for a while now but just never got to it. I made this about a week ago when I add some peppers to use up. I am always looking for new ideas for stuffed peppers. As I was thinking of various things I could do with these peppers I came up with an idea of stuffing them with lentils! I chose to go with a Mediterranean inspriation for these peppers. I really enjoy the flavors of the Mediterranean and these peppers feel very Mediterranean with all the lemon in them! I really like lemon, I just can’t get enough of it and it really brings these peppers to the next level!
This recipe is a great nutritious way to use lentils. The ingredients you can put into these stuffed peppers are endless. I chose vegetables that I had on hand that day but you can certainly use any vegetable you like or have on hand. I also added a panko topping to these peppers, I just think it adds something special to them. Serve these peppers as a main course with a salad and some toasted bread or as a side dish!
Mediterranean Inspired Lentil Stuffed Peppers

Ingredients
1 cup of lentils (I used plain old brown lentils, but you can use any lentils you have on hand)
4 Bell Peppers
1 onion, chopped
3 garlic cloves, minced
1 stalk of celery, cut into small pieces
1 small carrot , cut into small pieces
1 small zucchini, cut into small pieces
2 large tomatoes or 1 14 oz can of tomatoes
2 cups or more spinach chopped or any other leafy green
2 tablespoons olive oil
1/4 teaspoon rosemary
1/4 teaspoon oregano
1 teaspoon thyme
1/2 cup vegetable broth
half a lemon
Salt and Pepper to taste
For the Lemon Panko Topping
1/2 cup of panko breadcrumbs
2 teaspoons lemon zest
1/4 teaspoon thyme
1 tablespoon olive oil
1 tablespoon fresh parsley
In a saucepan add the lentils and about 2 cups of water and bring to a boil. When it is boiling bring the heat down to a simmer. Simmer the lentils for 15 minutes, you don’t want them to go mushy so keep an eye on them. They should still retain their shape. After 15 minutes, drain the lentils and set them aside.
Meanwhile, cut 4 bell peppers in half, take the seeds out but leave the stem intact. Bring a pot of water to a boil. After the water is up to a boil, drop the peppers in the water and blanch them for 3-5 minutes. Immediately add them to a bowl of ice water.
Preheat oven to 375.
In a food processor, pulse the two tomatoes until they are chunky and their juices release. (Skip this step if you are using canned tomatoes)
Now time for the filling! Heat a skillet over medium heat with two tablespoons of olive oil. Add the onions, carrots and celery and saute for 5 minutes. Add the garlic and saute until fragrant. Now, add the zucchini or any other vegetable you are using. Saute the zucchini for about 2 minutes. Now add the tomatoes, vegetable broth, and herbs. At this time season with salt and pepper. Cook the mixture for a few minutes. Now add the spinach and cook until wilted. Add the lentils and cook for another 2 minutes. Add the parsley and lemon juice. Re-season if necessary.
Lightly oil a casserole dish. Place the peppers in the casserole dish. Now stuff them with the lentil mixture genoursly. Cover them with tin foil and bake them for 25-30 minutes. After 25-30 minutes take the tin foil out and sprinkle the peppers with the topping. Bake uncovered for another 15 minutes until the top is golden brown. That’s it! Let cool for a couple of minutes and serve with plenty of lemon slices!
For the Lemon Panko Topping
Heat a small pan over medium heat with 1 tablespoon of olive oil. Add the panko bread crumbs and thyme, cook for a few minutes until the panko bread crumbs are well coated. Now add the lemon zest and parsley, Season with salt and pepper. That’s it!
Hello everyone! This past weekend I made some seitan which turned out delicious! I used the seitan recipe in Vegan with a Vengeance with a few modifications. I was looking to make a stringy seitan and I attempted to do that by kneading the seitan dough and then I stretched it and repeated with the kneading for about 5 minutes. I think the stretching made a great difference in the texture of the seitan. I really enjoyed the texture of this seitan and I will try to continue to experiment with the texture.
Moving on to the recipe! My grandparents were preparing to cook some stewed green beans with beef. I asked my grandpa if he needed all the green beans and he said no, so I took about two cups of the green beans. I really wanted them to make the dish with seitan but they were not fully convinced. They have both tried seitan a few times but are still not convinced to use it in their dishes yet. They always laugh at me when I tell them I am making “meat” from flour! I keep explaning to them that it’s so pure and simple it’s just wheat gluten, a couple of spices, broth and that’s it. I really want to get them to eat seitan instead of meat but that were probably take so long as they don’t like to explore many different foods. Anyway I decided to make a delicous vegan adaption of their dish they were making! I really enjoy stewed green beans and I have blogged about them before. This time I decided I wanted to step it up a notch and add some seitan! Stewed Green Beans is a very popular Albanian dish that my mom would make all the time when she cooked, she usually made it with smoked meat. That is where I got the idea to flavor my seitan with some liquid smoke and smoked salt for a delicious smokey taste. The smokey seitan really give the recipe some kick! I like adding potatoes to my stewed green beans which I learned from my grandma. As the potatoes cook they thicken the sauce really good. I really enjoyed the taste of this stew!

Albanian Style Stewed Green Beans and Potatoes with Smokey Seitan
Serves 2 people
This Stewed Green Bean recipe is a great flavorful way to use green beans! The recipe makes enough for two hungry people, so if you have more people at home double the recipe. The recipe uses three tablespoons of olive oil so if you want to make this lower fat feel free to reduce some of the oil. I use smoked salt in this recipe which is very tasty and perfect for creating a smokey flavor in addition to the liquid smoke.
Ingredients
1 1/2 cups of Seitan, cut into bite size pieces
2 cups of Green Beans, trimmed and cut in half
1 small red potato, cut into bite-size pieces
1 medium onion, sliced thinly
3-4 garlic cloves
1 medium tomato or one half of a large tomato diced
1 teaspoon paprika
1/2 teaspoon oregano
Pinch of chili flakes (optional)
2 cups vegetable broth or water ( You may need to add more liquid)
3 tablespoons + 1 tablespoons of Olive Oil
1 1/2 teaspoons – 2 teaspoons of liquid smoke (My liquid smoke was a bit weak flavored so I had to use more until I got the right flavor, so adjust to your taste)Smoked salt to taste (Optional, if you don’t have smoked salt feel free to use regular salt)
Heat a medium pot over medium heat with 1 tablespoon of olive oil. When hot enough, add the seitan and saute until golden on all sides about 4-5 minutes. Towards the end at the liquid smoke and Smoked Salt. Remove from pot and set aside.
Now add about 2-3 tablespoons of Olive Oil to the pot. Add the onions and saute for a good 8 minutes until they are translucent and tender. If your pot has burned pieces from the seitan, deglaze it with a bit of vegetable broth. Add the garlic and saute for a minute until fragrant. Now it’s time to add the green beans and potatoes. Saute the green beans and potatoes for about 5 minutes.
Now add the tomato, paprika, oregano, chili flakes and season with salt and pepper. Saute for another two minutes. Add the vegetable broth or water and bring to a boil and then to a simmer. After a couple of minutes add the seitan that you have set aside. Simmer the stew for about 45-50 minutes until the green beans and potatoes are tender. If the stew starts to get dry simply add some more broth. Re-season with salt and pepper to taste if necessary. Remember to not go heavy on the salt because the Smokey Seitan is salt already from the smoked salt. Let the stew sit for 15 minutes or you can eat it has soon has it finished cooking.
I like to serve these stewed green beans with some rice, bread, and a side salad or vegetable.
Hey everyone! It’s been a couple of weeks since I last blogged. This month flew so fast! This month wasn’t that great for me since I got strep throat! I was put under the dreaded antibiotics for 10 days! It turns out this is the only way you can cure strep throat, with antibiotics. I tried salt and water in the beginning and it seemed to work but after a week I felt very tried so I went to the doctor who prescribed me those antibiotics! I really hate antibiotics! Anyway, I’m feeling a lot better now!

Zucchini Pasta with Raw Marinara Sauce
I recently got Raw Food/Real Worldfrom the library as I was searching for new cookbooks. The cookbook has some of the most amazing food pictures I have ever seen. I got the “uncookbook” so I can learn more about raw vegan food. I was impressed! I still didn’t try any of the recipes but I did make something raw of my own. I made a very easy raw zucchini “pasta” with a raw marinara sauce. All I really did was peel some zucchini into thin slices and then I made a quick sauce in the food processor. It was really tasty! I felt really good after eating it, for some reason I had a lot of energy after eating it. I don’t plan on going fully raw, but I am interested in trying various recipes and hopefully I just got a juicer yesterday!
Here’s some Baked Pumpkin Ziti I made last week from Veganomicon. I never got around to making this awesome recipe last fall. This Baked Pumpkin Ziti was the first recipe I made from Veganomicon! It’s a favorite of mine! It’s so tasty!

Baked Pumpkin Penne
Finally, some Chana Masala! Chana Masala was one of the first Indian foods I have tasted. I never tried to make it until earlier this week. I looked at various ways to make Chana Masala, and came up with a great recipe! It’s really tasty, and I plan on making it next month again! I think it’s going to be a new favorite because it’s so easy and flavorful. I’ll share the recipe soon! I was so happy that it tasted like the Chana Masala I had first tried. I’m really enjoying exploring Indian food. I really like watching Manjula’s Kitchen and other Indian cooking shows on youtube. I also like reading Hooked On Heat which has a lot of information about Indian cooking.

Chana Masala
Well that’s about it for now! I hope to blog again very soon!
Hey everyone! This week I was really craving Indian food! I normally don’t make Indian food that often, in-fact I really only made it a couple of times at home and ate it a couple of times at Indian restaurants. Anyway I saw a Red Lentil Dahl recipe on the The Post Punk Kitchen recipe corner a while ago. I have been meaning to make it for quite sometime and I finally made it this past Monday. This was the first time I made a Dahl. When I was making it I wasn’t sure I was going to like it because I was a bit skeptical of all the spices that were going in it. There were a lot of awesome spices in the Dahl. This dahl made my house smell so nice and fragrant! Now let’s get to the good part! After 40 minutes of cooking my first dahl was done! I made some brown basmati rice which I flavored with some cardamon and I also made some steamed broccoli to accompany my dahl. Now dahl isn’t the most good looking dish in the world but I tried to make it look nice. I plated everything up and started eating.

Red Lentil Dahl, Basmati Rice and Steamed Broccoli
I was amazed at the flavor of the dahl! As I was eating it I could almost taste each spice I had put in it. It was so flavorful and delicious! Each day the dahl got better and better until it was all gone! Isa never let’s me down and I am so happy she created this awesome dahl recipe! I will definitely be making more dahl and Indian food frequently! I think I am hooked on Indian food now! I really suggest making this recipe as soon as possible, it’s so good!
This week I also made some delicous pumpkin cookies which were testers for Isa and Terry’s upcomping cookie cookbook! These cookies are pure goodness! I enjoyed them so much, I ate the whole batch in less than 24 hours with a little help from my mom! The recipe only used half a can of pumpkin so I was left with more pumpkin!

Pumpkin Cookies
Guess what I made?
I made the Awesome Pumpkin Muffins from Vegan with A Vengeance! I really wanted to take a picture of these but I ate almost all of them. These are my favorite muffins, they are so delicous! I wish I had a picture to show you all!
I do have another picture of my dog Madison in the snow this past Monday. It snowed a whole lot this Monday! We even got a snow day. It was a great chance to take some awesome photos but my brothers kept throwing snow on me in an attempt to ruin my camera so I had to go home! Luckily I got a few, this one really stood out of the few pictures I took of Madison.

Look at her head, it’s covered in snow! She had a blast in the snow on Monday! She really loves snow!
I really love Tofu as you have probably noticed! I am a big fan of Tofu’s clean taste and ability to absorb so many different flavors. I am always looking for different ways to prepare Grilled Tofu. I am a big fan of Balsamic Vinegar! I love everything about it, it’s a staple in my house. I always dress my salads with a simple Balsamic and Extra Virgin Olive Oil dressing. Salad dressing is not the only thing you can do with Balsamic Vinegar. It works really well for Tofu!
I use Balsamic Vinegar as a base for the tofu marinade which is then turned into a delicious glaze! This Tofu is really tasty. I have been playing around with the recipe for a few months and I think I finally got it right! This Balsamic Glazed Tofu has a slightly tangy taste with a touch of sweetness. It can be made grilled or baked, I tried both ways and both turn out really tasty! Like I said earlier the tofu marinade does not go to waste because it is reduced into a scrumptious glaze!
This Tofu is great served in a number of ways. I like to serve it with a grain and a vegetable side or chopped over a salad. This tofu recipe is great for the summer time when you are looking to fire up the grill even though it’s winter now! Here’s the recipe:

Balsamic Glazed Tofu
Grilled Version serves about 2-3 people, Baked Version serves about 3-4 people.
1 pound Extra-Firm Tofu, drained and pressed
For the Marinade/Glaze
1/2 cup Balsamic Vinegar
2 Tablespoons Soy Sauce
1/2 – 1 Tablespoon Agave nectar (This depends on how sweet you like it, if you like it more sweeter use ! tablespoon or more.
2 Tablespoons Extra Virgin Olive Oil
2 cloves of garlic smashed
A Pinch of Thyme, Oregano, Rosemary, and Marjoram. (Feel free to use any of your favorite herbs or leave them out completely if you wish)
You can Cut the Tofu anyway you like, I like to cut it into triangles or slabs.
For Triangles
Cut the Tofu in half diagonally. Now take the two tofu triangles and cut them into three triangles each. For the baked Tofu, cut it into 4 triangles each. You should get 6 triangles for the grilled tofu and 8 for the baked tofu.
For Slabs
Cut the Tofu width-wise into 5-6 pieces for grilled tofu and 7-8 pieces for the baked tofu.
After you have the cut the tofu, mix all the marinade ingredients in a mixing bowl. I like to marinade the tofu in an 8 by 8 baking pan. Pour the Marinade over the tofu. Marinade the tofu for at least an hour. Turn it halfway through. The longer you marinade it the better!
When the Tofu has marinated take the tofu out and set it aside. Strain the marinade to remove the garlic. Preheat a small saucepan over medium heat. Add the Marinade mixture to the saucepan. Bring it to a boil. You want to keep it on a medium simmer. Cook the marinade for about 10 minutes until it starts to thicken and look like a glaze. Remember to keep stirring unless you have a non-stick saucepan. You want to keep an eye on it to prevent it from burning, it happened to me once so that’s why I bring it up. I actually burned a saucepan from doing this a while back!
For Grilled Tofu
Preheat a Cast-iron grill pan to medium-high heat. When it is hot, place the tofu on the cast iron grill pan. Grill the Tofu about 2-3 minutes per side. If your tofu is cut into slabs, grill the tofu 1-2 minutes per side and then turn it 90 degrees to form cross-hatch grill marks. As the Tofu is grilling, brush it with the Balsamic Glaze.
For Baked Tofu
Preheat oven to 400 degrees F.
Place the tofu on a slightly greased baking sheet. Bake the tofu for about 20 minutes. Then flip it over and bake it for about 10 minutes. Brush it with the glaze towards the end because you don’t want the glaze to burn. If you like a chewier tofu place it under the broiler for 2-3 minutes, make sure to keep an eye for it!
Enjoy!
I got a lot of things to share with everyone tonight! Sorry for not blogging for a while. Last week I was a bit busy so I didn’t have time to blog. Luckily I found some time tonight!

Last Monday I made the Spicy Tempeh and Broccoli Rabe Pasta from Veganomicon. This was my second time making this pasta dish. The first time it was super bitter from the Broccoli Rabe, I didn’t enjoy it much the first time. I decided to give it another chance with spaghetti this time because it was all I had. My mom prepares Broccoli Rabe very well so I decided to ask her about the secrets. My mom says broccoli rabe has to be blanched for one to two minutes and then dropped into ice cold water. Just like tempeh where it has to be boiled for a couple of minutes to remove the bitterness, broccoli rabe benefits from the boiling water too. I decidedto try the blanching and it worked great! The blanching defiantly removes some of the bitterness of the Broccoli Rabe making it taste pleasant.. I really enjoyed the flavorful spicy tempeh and the slightly bitter broccoli rabe. I will now make this tasty pasta dish more often. I hope everyone reading this blog has Veganomicon, if you don’t I highly suggest getting it! Isa and Terry have taught me so much about cooking!
Moving along on Wednesday I made and Albanian recipe. It is called Pita or Burek, in Albanian.

My family mostly calls it Pita, I’ll refer it to Burek since it is more popular way to say it. There are many versions for Burek there is a coil version similar to the picture and a regular square version. I still havn’t learned how to make the dough fully by myself. My grandma made the dough for this pita and I made the filling. My mom is so good at rolling Burek dough, she can make its nice and thin. My grandma made it a bit thicker which is how she makes it all the time. It is very rare for Albanians to have recipes, we usually just eyeball everything. I ask my mom where are your recipes and she says “they are all in my head”. Next time I want to actually develop a recipe for the dough which should be fun! You can always take the easy route and just use phyllo dough but then it would be more like a Burek. I used a mixed mushroom filling for this Burek. Tradionally the two major fillings are cheese or ground meat and sometimes spinach/cheese. My mom always develops interesting fillings for Burek. She came up with this one a while back when we bought a lot of mushrooms. The first time my mom made it I was suprised with how good it was. I really love mushrooms and I was so happy my mom invented this new filling! I don’t have the recipe ready completely. I want to create an easy to follow recipe for Pita/Burek and will probably have it up soon!

Another dish I made this week was eggplant in a tomato pepper sauce. This was very easy to make. I just cut an eggplant into small triangles and then pan fried them. I then made a quick tomato pepper sauce with fresh tomatoes and some canned, onions, garlic, and a green pepper. Seasoned it with some oregano, thyme, and of course salt and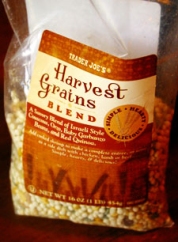 pepper. I threw the fried eggplant into the sauce and simmered it for a few minutes and Voilá I had an awesome dinner! I normally don’t like eating summer vegetables in the winter time but sometimes you get that craving for a summer vegetable. Although this eggplant dish doesn’t look too photogenic it was very tasty! I served it with a delicous product I just discovered at Trader Joe’s. It’s called Trader Joe’s Harvest Grain Blend, it basically features Israeli couscous, along with red and green orzo, split dried garbanzo beans, and red quinoa. I really like it because it cooks up so quick and it has so many different things in it. Next time your at Trader Joe’s pick this up, you’ll love it!
I’ll leave you with my dog, Madison. This is her first appearance on my blog! I took this picture a while back but I just had to share it with everyone know because she worked so hard on our little “photoshoot”. In this picture she is in the snow, which it is actually snowing right now as well. Look how serious she is! I am so excited for tomorrow because my school has issued a snow day! My school rarely gives out snowdays! It’s supposed to snow a whole lot here in New York!

Madison says Hello to everyone reading!


